Friday, August 30, 2013

"Summer Sunset"

Each season has its particular beauty, and a summer sunset at the beach has its own special glory. This photo was taken last summer when Gary and I went to the East Coast for our 30th anniversary. One evening we went to the beach and boardwalk of Atlantic City. The Boardwalk held little attraction for me, but the beauty of the sea was just amazing and this 7 Dots Studio 9th Wave Collection was just perfect to showcase it along with Really Reasonable Ribbon and RRR's new Wild Orchid Crafts Mulberry Flowers

"Summer Sunset"

I'm posting this over at the August Sketch Challenge up at Dusty Attic with inspiration from Mistra's gorgeous sketch which I've turned as shown: 


Tips and Techniques: 
I painted the leafy DA chipboard flourishes with several shades of metallic Lumiere paint, then added some gold Shimmerz Blingz to highlight. 

Another DA Chipboard piece that reminds me of floating sea grass. 

I created this triple loop bow with Sheer Iridescent Blue/Green Organza Ribbon by May Arts. I used a variation of Ginny's Double Loop Bow Tutorial found here

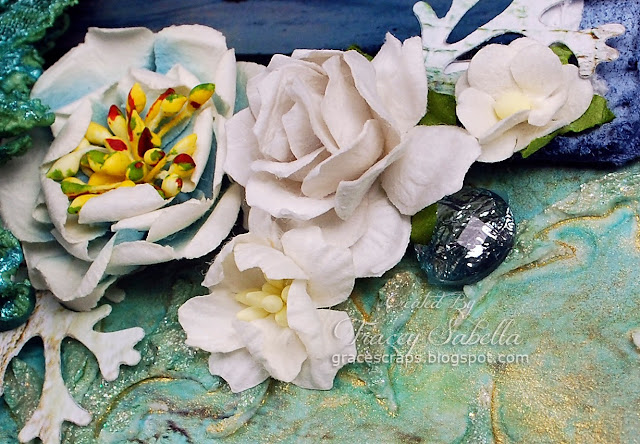
Included in my cluster are some of Bonnie's new Wild Orchid Crafts Mulberry Flowers which are a new offering at RRR. Here I've used the White Sweetheart Bossoms, White/Cream Cherry Blossoms, and the White 30mm Wild Roses

Here you can see another of the Sweetheart Blossoms tucked in with a Petaloo flower and Spellbinders Foliage leaves that remind me of seaweed. 

Here's a close-up of the mixed media I applied to my background - a blending of molding paste with a Prima stencil, mist, and Shimmerz Blingz. You can see my misted lace as well using a couple different mists.

Really Reasonable Ribbon Products:

Other Products Used:
7 Dot's Studios ~ 9th Wave Collection
Creative Imaginations Alpha Stickers
Dusty Attic Swirly Vine #2 ~ DA0621
Dusty Attic Corner Flourish #3 ~ DA0623
Petaloo Flowers
Manor House ~ Winter's Song Log Cabin Flowers
Lumiere Paint
Shimmerz Blingz
Liquitex Gesso, Flexible Modeling Paste
Golden Molding Paste
Heidi Swapp Color Shine
Tattered Angels Glimmer Mist
Mister Hueys Mist 
Ranger Distress Ink
Tim Holtz ~ Washers Border Die
Spellbinders ~ Foliage Die
Prima Stencil ~ Flourish
Distrezz-it-All
Big Shot
Ranger Craft Mat
Fiskars Craft Knife and Self-Healing Mat
Helmar 450 Quick Dry Adhesive

Follow on Bloglovin

Thanks for stopping by! I treasure your comments.

~ Blessings ~

Tuesday, August 27, 2013

Really Reasonable Ribbon Pre-Labor Day Sale

It's a great time to purchase ribbon, lace, flowers and more from Really Reasonable Ribbon. Bonnie is having a Big 4-Day Pre-Labor Day Sale.
We're rolling in with a BIG 4-Day SALE here at Really Reasonable Ribbon.  We're doing our Labor Day SALE early so you can shop now and enjoy the long weekend with your family!


 Now through midnight Eastern Time on Friday, 8/30/13 we have a terrific SALE going on. The more you buy, the more you save!!Please use the applicable code found below in the promotional code area on the first page at checkout.

The codes are good now through midnight Eastern time on Friday 8/30/13.

(Sale code is not valid on prior orders, ribbon club subscriptions, ribbon club gift subscriptions, or special order items).
 
For all the details and to get your code, stop by the Really Reasonable Ribbon Blog HERE

Saturday, August 24, 2013

"Remember"

Remembering is so important. Really, isn't capturing memories a big part of what drives our passion for scrapbooking? It's always so much fun to gather with family and friends to reminisce about the good times we've experienced together. It's also a blessing to remember the times we've had with those who are no longer with us. Earlier this year, beautiful Brittany went home to be with our Lord after a tragic accident. I never had the opportunity to meet her; however, she was active in the youth group our son and sweet daughter-in-law help with. Rachel had just this one photo of them together taken on her cell phone. I wanted to create a special page for Rachel to remember this special day with Brittany along with all the good times they experienced together. 

The Challenge at Once Upon a Sketch is to create a page including journaling with the theme "I'll Never Forget." 

"Remember"

Inspired by this gorgeous sketch:

I have included hidden journaling in the form of a tag attached to the back of my layout. It says. "Rachel, may the memories of Brittany live in your heart forever. You were a special person in her life who meant so much to her." I've also left room on this tag for Rachel to record some of her special memories of their time together. 

Tips and Techniques:
I really enjoyed using the 7 Dots Studio's Messy Head collection for this page. Rachel loves pink, so it was just perfect for this layout. 

The Dusty Attic Bricks fit the brick pattern on this paper perfectly. I topped them with ceramic stucco tinted with Mix'd Media Inx. When dry I misted them with black mist and then painted with gesso tinted with Distress Ink to add just a touch of pink 

The leaves are handcrafted using the Foilage die by Spellbinders. After cutting I crinkled them to form natural leaf veins and inked. 

I used Wild Orchid Crafts Mulberry Flowers now available in the Really Reasonable Ribbon Store. Bonnie carries many varieties, and I think I used nearly all of them on this page. I also included a couple larger flowers from Prima and Petaloo. I dry brushed most of the flowers with gesso and the grey Prima flower was dry brushed with gesso tinted with distress ink. One way to tint gesso or other mediums is to directly apply ink from your ink pad to a non-stick craft mat, then add a spot of gesso or other medium to the mat and mix the two mediums together. If you need more color, just apply more ink to a clean spot on your mat and keep on mixing it in. It's so easy and creates a color to perfectly match your project. 

I colored the Dusty Attic Grass clusters, then applied Designer Dries Clear glue to the tips to adhere microbeads. The triple loop bow is tied with RRR 3/8" White Organza.

Here's a close-up to show the mixed media. I stenciled the Prima crackle design with tinted molding paste. Once dry I misted and dripped some homemade mist around the page. I didn't have a color that worked with this paper collection in my stash, so I mixed drops of several re-inkers with water in a small misting bottle until I came up with this color. I also dripped flecks of teal across the page. 

To add more texture I brushed on a thick coat of matte gel medium and sprinkled on tiny glass marbles. The gel dries clear leaving such wonderful texture and adheres the beads. These little mini marbles really catch the light. When dry I adhered a few scattered pink rhinestones. I also stenciled two clocks, tucked in around the photo. I selected these particular stencils to represent remembering the good times with Brittany and the shattered emotions of those who knew and loved her. 

To extend the photo mat, I die cut, embossed, and inked chipboard. I also tucked in some pretty, decorative lace from my stash under the title. 

I've mentioned before how I enjoy using jewelry finding pieces like this dangling earring piece. I wired the beads to attach to the chains. The Lyndsey Crocheted Lace below this piece is from the RRR Store

Thanks for spending some time with me today. Have you created pages to remember someone special?

I have also entered this at:
Word Art Wednesday Challenge #94 Anything Goes

Follow on Bloglovin

Thanks for stopping by! I treasure your comments.

~ Blessings ~

Thursday, August 22, 2013

Timeless Love ~ for Donna Salazar Designs

Here's my latest page for Donna Salazar Designs. Weddings are a special day for a bride. For this layout, I combined soft blues and pinks from all three of Donna's latest GCD Studios collections: Natural Beauty, Family Jeans, and Fun & Funky to showcase this dreamy photo of our daughter, Elizabeth, on her special day. 

"Timeless Love"

Tips and Techniques:
This focal flower features Donna's Spellbinders Grand Peony and Bitty Blossoms Dies. All the details can be found below in my Shabby Layered Blossoms Tutorial. 

I finished out my flower cluster with a variety of Bitty Blossoms. I also tucked in several crystal flourishes from Donna's Want2Scrap Build Your Own Bling. The chicken wire and heart buttons are from my stash.

The Bitty Blossoms from another angle.

I used Donna's Art Gone Wild Heart Applique stamp with Chiffon Mix'd Media Inx and Clearsnap Clear embossing powder to create these hearts that I fussy cut for my banner. I tucked in lace pieces adorned with Want2Scrap Teardrop Pearls

The large doilies are cut from Family Jeans - Heirloom and Natural Beauty - Blue Fence then the edges inked with Mix'd Media Inx and adorned with Want2Scrap Pearls. I stenciled here with Donna's Want2Scrap Heart Stencil and above the photo with her Leaves Stencil using molding paste then spritzed with Donna's River Mossy Smooch Spritz by Clearsnap. 

This double loop bow is tied with Iridescent Champagne Organza from Really Reasonable Ribbon topped with a Bitty Blossom flower. The ribbon is also looped through the design of the smaller doily. 

I embellished the denim back side of this Fun and Funky Yellow Polkas paper with Donna's gorgeous Art Gone Wild Brass Corner and Bubble Wrap Stamps. I combined Mix'd Media Inx and Mix'd Media Inx Embossing powders to achieve these shabby corners. And of course I used my favorite scrappy tool, Donna's Zutter Distrezz-It-All to distress the edges. 

I painted this Want2Scrap Fancy Chipboard Word with white gesso and inked with Bluejay Mix'd Media CHOX Inx. When dry I heat embossed with clear embossing powder by Clearsnap. 

Notice the grid design on the background. Before adhering my flowers and photo, I randomly placed pieces of drywall mesh tape and spritzed the page with River Mossy Smooch Spritz. When dry, I removed the tape leaving these great grid marks. The smooch added a ton of sparkle along with the subtle color. 

Now I'd like to share the details on how I created my layered focal flower. 

Shabby Layered Rose Tutorial

Supplies:
Supply List:
Spellbinders ~ Grand Calibur (not pictured)
Spellbinders ~ Donna Salazar Designs - Grand Peony
Spellbinders ~ Donna Salazar Designs - Bitty Blossoms
Spellbinders ~ M-Bossibilities
GCD Studios ~ Donna Salazar - Natural Beauty papers of choice
Ivory Crushed Voile Fabric
Tea light or other small candle
Bowl of water (not pictured)

Step 1. Die cut the following papers and fabric:
3 Grand Peony #6 from paper for outer petals (numbered from smallest to largest dies)
3 Grand Peony #4 from ivory crushed voile
1 Large Bitty Blossoms from paper for flower center

Step 2. Emboss the three outer Petals.

Step 3. Roll and shape Bitty Blossoms flower for center.

Step 4. Curl edges of crushed voile petals by pulling each petal close to, but not in the flame of your candle. Be sure to have a bowl of water next to you just in case your petal gets into the flame and needs extinguished. 

***Hint*** Start with a short candle wick. You don't want your flame to be too large. 

I have found that I can cut up to 5 layers of crushed voile at a time with the following sandwich ~ listed from the bottom to the top: cutting plate, cardstock, fabric layers, die - face down towards fabric, and on top another cutting plate. You may need to run this through your die cut machine several times for a complete cut.

Step 5. Shape outer embossed petals by curling each petal over a round pencil and pushing the petal upwards.

Step 6. Curl each petal side down over a round pencil to create a natural petal shape.


Step 7.  Assemble the three outer petal layers by placing a drop of quick drying glue in the center of each set of petals and glue together, off-setting the petals as shown.

Step 8. Assemble the three fabric petal layers, off-setting as you glue them together as in the previous step.

Step 9. Glue fabric layer on top of embossed layer.

Step 9. Glue the Bitty Blossoms flower to the center of your flower.

*** Hint*** If you would like a flatter flower you could use a large decorative crystal brad or button in place of the Bitty Blossom flower.

Side view of finished flower:

Thanks so much for dropping by to check out my layout and tutorial!! 

~ Blessings ~

Supply List
Paper:
GCD Studios: Donna Salazar Designs ~ Family Jeans - Heirloom
GCD Studios: Donna Salazar Designs ~ Family Jeans - Denim Stripe
GCD Studios: Donna Salazar Designs ~ Family Jeans - Family Dots
GCD Studios: Donna Salazar Designs ~ Family Jeans - Denim Stripe
GCD Studios: Donna Salazar Designs ~ Fun & Funky - Yellow Polkas
GCD Studios: Donna Salazar Designs ~ Natural Beauty - Twiggy
GCD Studios: Donna Salazar Designs ~ Natural Beauty - Blue Fence
GCD Studios: Donna Salazar Designs ~ Natural Beauty - 6" x 6" Pad
Chipboard:
Want2Scrap ~ Fancy Chipboard Word - Love
Stamps:
Art Gone Wild: Donna Salazar Designs ~ Brass Corner, Heart Applique, Bubble Wrap
Color/Inks:
Clearsnap: Donna Salazar Designs ~ Mix'd Media Inx - Jasmine, Chiffon, Denim
Clearsnap: Donna Salazar Designs ~ Mix'd Media Inx CHOX - Bluejay
Clearsnap: Donna Salazar Designs ~ Mix'd Media Inx Embossing Powder - Jasmine, Denim
Clearsnap: Donna Salazar Designs ~ Smooch Spritz - River Mossy
Clearsnap: Top Boss Embossing Powder - Clear
Stencils:
Want2Scrap: Donna Salazar Designs ~ Heart
Want2Scrap: Donna Salazar Designs ~ Leaves
Dies/Embossing:
Spellbinders: Donna Salazar Designs ~ Grand Peony
Spellbinders: Donna Salazar Designs ~ Bitty Blossoms
Spellbinders: Pendants In Spades
Spellbinders: Heartfelt Creations ~ Blossom Corner
Spellbinders: M-Bossabilities - Flora
Punches:
Martha Stewart Circle Edge Punch with Flower Arches, Modern Lace
Embellishments:
Want2Scrap: Donna Salazar Designs - Build Your Own Bling
Want2Scrap: White Pearls, Teardrop White Pearls
CTMH: Timeless Charms
Really Reasonable Ribbon: May Arts Iridescent Sheer Ribbon - Champagne
Stash: Lace, Heart Buttons, Cherub Charm, Chicken Wire
Mixed Media:
Liquitex: White Gesso
Golden: Light Molding Paste
Adhesives:
Helmar: 450 Quick Dry Adhesive
Beacon: 3 in 1 Advanced Craft Glue
Art Glitter: Designer Dries Clear Adhesive
Tombow: 3D Foam Tabs
Tools:
Zutter: Donna Salazar Designs ~ Distrezz-It-All
EK Success: Honey Bee Scissors
EK Success: Tweezers
Darice: Heat Tool

I have entered this at:
Word Art Wednesday Challenge #94 - Anything Goes

Follow on Bloglovin

Thanks for stopping by! I treasure your comments.

~ Blessings ~
Wednesday, August 21, 2013

Card and Twine Wrapped Corrugated Heart Tutorial

I had fun creating my first easel card for Elizabeth and Andrew's anniversary featuring ribbon and flowers from Bonnie's Really Reasonable Ribbon Store. It's hard to believe it's been nearly a year already since their wedding.

"Love Needs No Map"

Really Reasonable Ribbon Products:
(Only 2 colors left - be sure to get yours before they're gone)


Tips and Techniques:
This wrapped double loop ribbon was created in two steps. First, I wrapped the mat layer with Silky Crush Ribbon, adhering to the back of the layer with Scor-Tape so the ends are not visible on the finished card. Where I planned to add the bow, I gathered and tied the base ribbon strip with a small piece of wire. I then tied a double loop bow and glued in place. 

To embellish this bow, I added one of Bonnie's new WOC Trellis Roses and tucked in a strip of delicate lace from the August Ribbon Club Assortment. Bonnie has added a fabulous assortment of Wild Orchid Crafts Flowers to the store. Be sure to check them out here

I created the stick pin with a corsage pin and beads from my stash. 

The sentiment is a cardstock sticker coordinating with the lovely SEI Promise Me collection used for this card. Of course, I had to get in some of my signature distressing on the mat around the sentiment. 


Scroll down for a tutorial to create this charming Twine Wrapped Corrugated Heart. I used the Bamboo Cord Assortment and a WOC 20 mm White Open Rose. I used a fine tip paint brush to add a touch of pink to the center of this sweet rose. I popped up the solid heart using Tombow 3D Foam Tabs

This is the inside/base of my easel card. I framed my stamped sentiment with a chipboard frame layered over more of the Silky Crush Ribbon wrapped around the card base. The pearls are not only decorative, but are placed to hold the top of the card in place when displaying. Bonnie is discontinuing these pearls so if you need the colors that are left, grab them while they are still available. 

These gorgeous heart skeleton keys are from Craftpon.com.

I hope you enjoy my tutorial for the wrapped corrugated heart. Bonnie sells a wide variety of twine and any of them would look great wrapped around one of these hearts. 


Twine Wrapped Corrugated Heart Tutorial

Supplies:
Supply List:
Twine - (I used 20lb white bamboo, but you could use any twine.)
Inks - in colors to coordinate with project. One lighter and one darker
Embossing Powder to coordinate with your inks (Optional)
Heart Die
Corrugated Board (I used Donna Salazar's corrugated board by Zutter.) 
Tweezers (Optional but helpful for holding heart during embossing. 
Small Flower
Paint or gesso - not pictured
Die cutting machine - not pictured
Embossing tool - not pictured. (Only needed if you use the embossing powder.)

**Note** If you do not have a heart die, you could also hand cut a heart from corrugated board.

**Note** There are many different sizes of corrugation from the tiny ridges in postal boxed to the larger ridges in the corrugated board I used here. Use what you have available and what goes with your project. 

Step 1. Cut heart from corrugated board. 

**Note** if you have used a die to cut your heart, you can cut a border around the negative to create a heart outline to pair with your wrapped heart like I did for my card. 

Step 2. Paint heart to coordinate with your project. Here I used DecoArt Americana Buttermilk craft paint. I often use white gesso as well. Sometimes I just paint the top of the ridges leaving more of the natural corrugated kraft color showing. Here, I left some small areas of the natural kraft color showing for a more rustic feel. If you want to just paint the tops of the ridges, dry brushing with a foam brush works best. 

Step 3. Select an ink for your primary color. I used Mix'd Media Inx and embossing powder in Chiffon. Ink the edges of your heart, drawing the ink towards the center, but not completely covering the heart. While your ink is wet, sprinkle with coordinating embossing powder and heat set. The heart is small, so a pair of tweezers comes in handy to hold it while heat embossing. If you desire a more rustic look, you can just ink without embossing. 

Step 4. Select a contrasting ink for your edges. I used Mix'd Media Inx and embossing powder in Honey. Just dab a little ink on the very edges, then sprinkle with embossing powder and heat set. 

Step 5. Wrap twine around your heart and glue ends to the back of the heart. 

Step 6. Rub ink on the twine. I used Mix'd Media Inx Honey. 

Step 7. Select a small flower that coordinates with your project. I used one of Bonnie's new Wild Orchid Crafts 20 mm Open Roses. For my card I used a white rose and painted the center with glimmer mist. Here I've used an Ivory and Pale Pink Rose

One more shot of the embellished heart on my card:


I also included on of these hearts on my ScrapThat! August Kit Project ~ "Celebrate":

I've entered this at:
Word Art Wednesday ~ Challenge #94

Follow on Bloglovin

Thanks for stopping by! I treasure your comments.

~ Blessings ~